Ciabatta using Double Flour Addition/Double Hydration
Feb 1st, 2009 by SteveB
In the previous post (More Musings on Mixing… ), I described a newly devised ‘double flour addition’ dough mixing technique which will allow a home baker, using a conventional tabletop stand mixer, to produce a well developed, nicely aerated dough nearly identical to those produced by professional bakers using commercial mixing equipment. While it was demonstrated that one could use the double flour addition technique to produce a pain au levain with the desired open crumb, there was still a question about the versatility of the technique. Could double flour addition be used to produce the type of high hydration dough used to create the wide open crumb structure characteristic of a ciabatta?
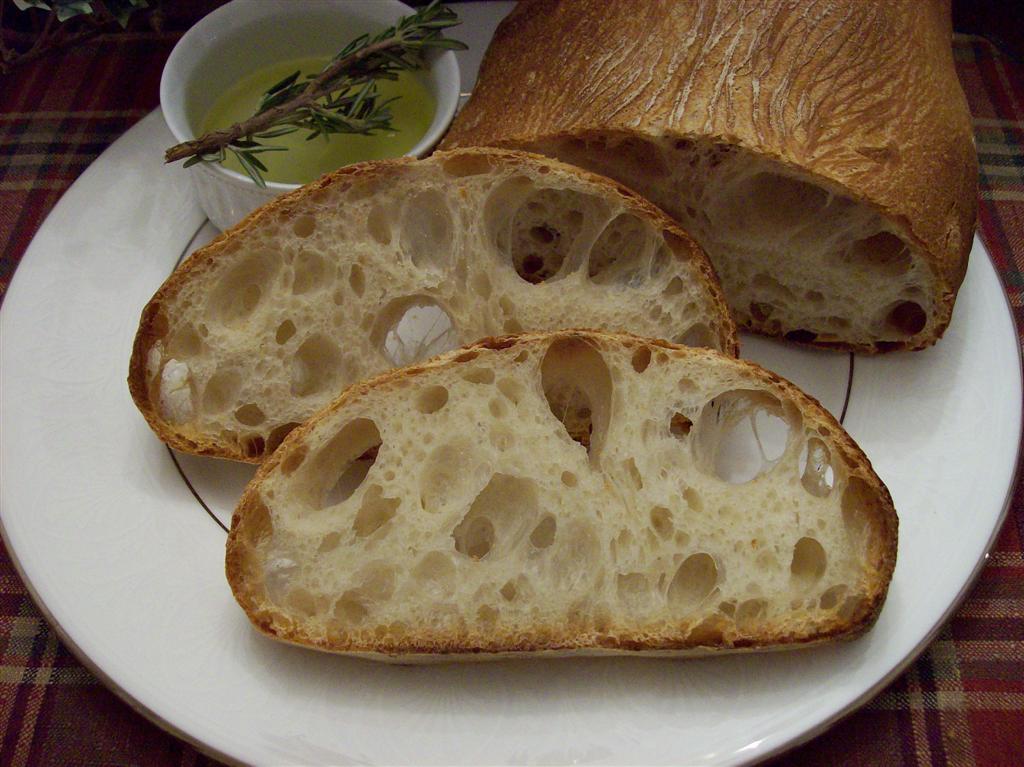
To answer this question, I decided to go back to my original ciabatta recipe (Ciabatta using Double Hydration) and modify it slightly by introducing a double flour addition step near the beginning. In essence, the ciabatta dough was prepared through a tandem ‘double flour addition/double hydration’ sequence. The result was a loaf with the wide open, slightly translucent crumb structure characteristic of a classic artisanal ciabatta.
Poolish
- 190 g King Arthur Organic Select Artisan Flour
- 190 g Water
- 1/8 tsp. Instant Yeast
Final Dough
- 310 g King Arthur Organic Select Artisan Flour
- 190 g Water
- 10 g Salt
- 1/8 tsp. Instant Yeast
- 15 g Olive Oil
- 380 g (all of the above) Poolish
The night before baking, the poolish is made by mixing the flour, water and yeast until all the ingredients are well incorporated. The poolish is then covered with plastic wrap and allowed to rest at 70şF overnight until mature, about 12 hours.
The next day, all of the poolish is added to only 150 g of the full 190 g of water (the remaining 40 g of water is set aside for later use) in the bowl of a stand mixer. The olive oil is then added and the mixture is mixed at low speed, using the whisk attachment, until a homogeneous slurry is obtained, about 2 minutes. The mixer speed is then increased to speed 3 and enough of the flour (~ 25-30 g) is added to produce a thin batter capable of maintaining a stable air emulsion. The whisking is continued for an additional minute after which time the mixer is stopped and the remaining flour and yeast is added. Switching to a spiral dough hook, the mixture is mixed on speed 2 just until all the flour is hydrated, about another 2 minutes. The resulting mixture is then covered and allowed to rest at 76şF for an autolyse period of 30 minutes.
After the 30 minute autolyse, the salt is added and the dough is mixed with the spiral dough hook at speed 3 until a smooth, medium soft consistency dough is obtained, about 10 minutes. With the mixer still at speed 3, the remaining 40 g of water is added in small increments over a period of another 10 minutes, with each incremental addition being added only after the previous addition has been fully incorporated. The resulting very fluid dough was then transferred to an oiled container, covered and allowed to ferment for 3 hours.
After the 3 hours are up, the dough is turned out onto a well-floured surface and is divided in half. Each dough piece is then gently stretched to the ciabatta’s characteristic oblong shape, placed on a well-floured couche, covered and allowed to proof at 76şF for 1 hour. After proofing, the dough pieces are gently flipped onto a transfer peel and then slid from the transfer peel onto an oven peel. The dough pieces are then loaded into an oven pre-heated to 450°F. The pieces are baked at 450şF for 35 minutes, under steam for the first 15 minutes of baking. The resulting loaves have a nice crispy, light crust with a wide open interior crumb.
(submitted to YeastSpotting)

Thanks so much. I made it many times with your recipe, and always turns like on your pictures.
I am trying this recipe for the first time today. I made one mistake. I forgot to add the salt after the 30 minute autolyse. So the dough was mixed for the 10 minutes without the salt. I added the salt and mixed for 2 minutes till the dough tightened up. Then began the water additions and 10 minutes further mixing as per instructions. I kept the dough to about 74 deg f during the entire mixing period. What change might I expect?
Thanks
David
Hi David,
I suspect that the effect of the delayed salt addition as you described will be minimal. I’d be interested to hear about your results.
Steve,
They came out good. I used KA AP since it matched the protein content of what you used. Not as high a rise, but good hole and crumb structure, great flavor. I wanted to let the first and second go longer due to poor looking growth, but I followed the numbers. Ferments were all within 1 deg of your specs. Time was too long for my oven. I pulled them at 30 minutes based on looks, and the internal temp was 112. Next time I will pull at 25 and check. This was my first time using an oven steel. I bought some 1/4″ a36 steel plate on ebay, cleaned and seasoned it. Much, much better than a stone. Now I will play with different flours. I have several imported Italian 00 flours I want to try.
Thanks David