Peanut Bread
Nov 30th, 2008 by SteveB
Ever since George Washington Carver first started experimenting with the peanut plant in the early 1900’s, the peanut has become one of America’s most versatile legumes. The peanut has become so ingrained into American culture that the USA team competing at the 2005 Coupe du Monde de la Boulangerie decided to present a peanut bread as one of its contest entries. Team USA named their bread ”Jimmy’s Bread”, a tribute to the 39th president of the United States, Jimmy Carter, who was once himself a peanut farmer.
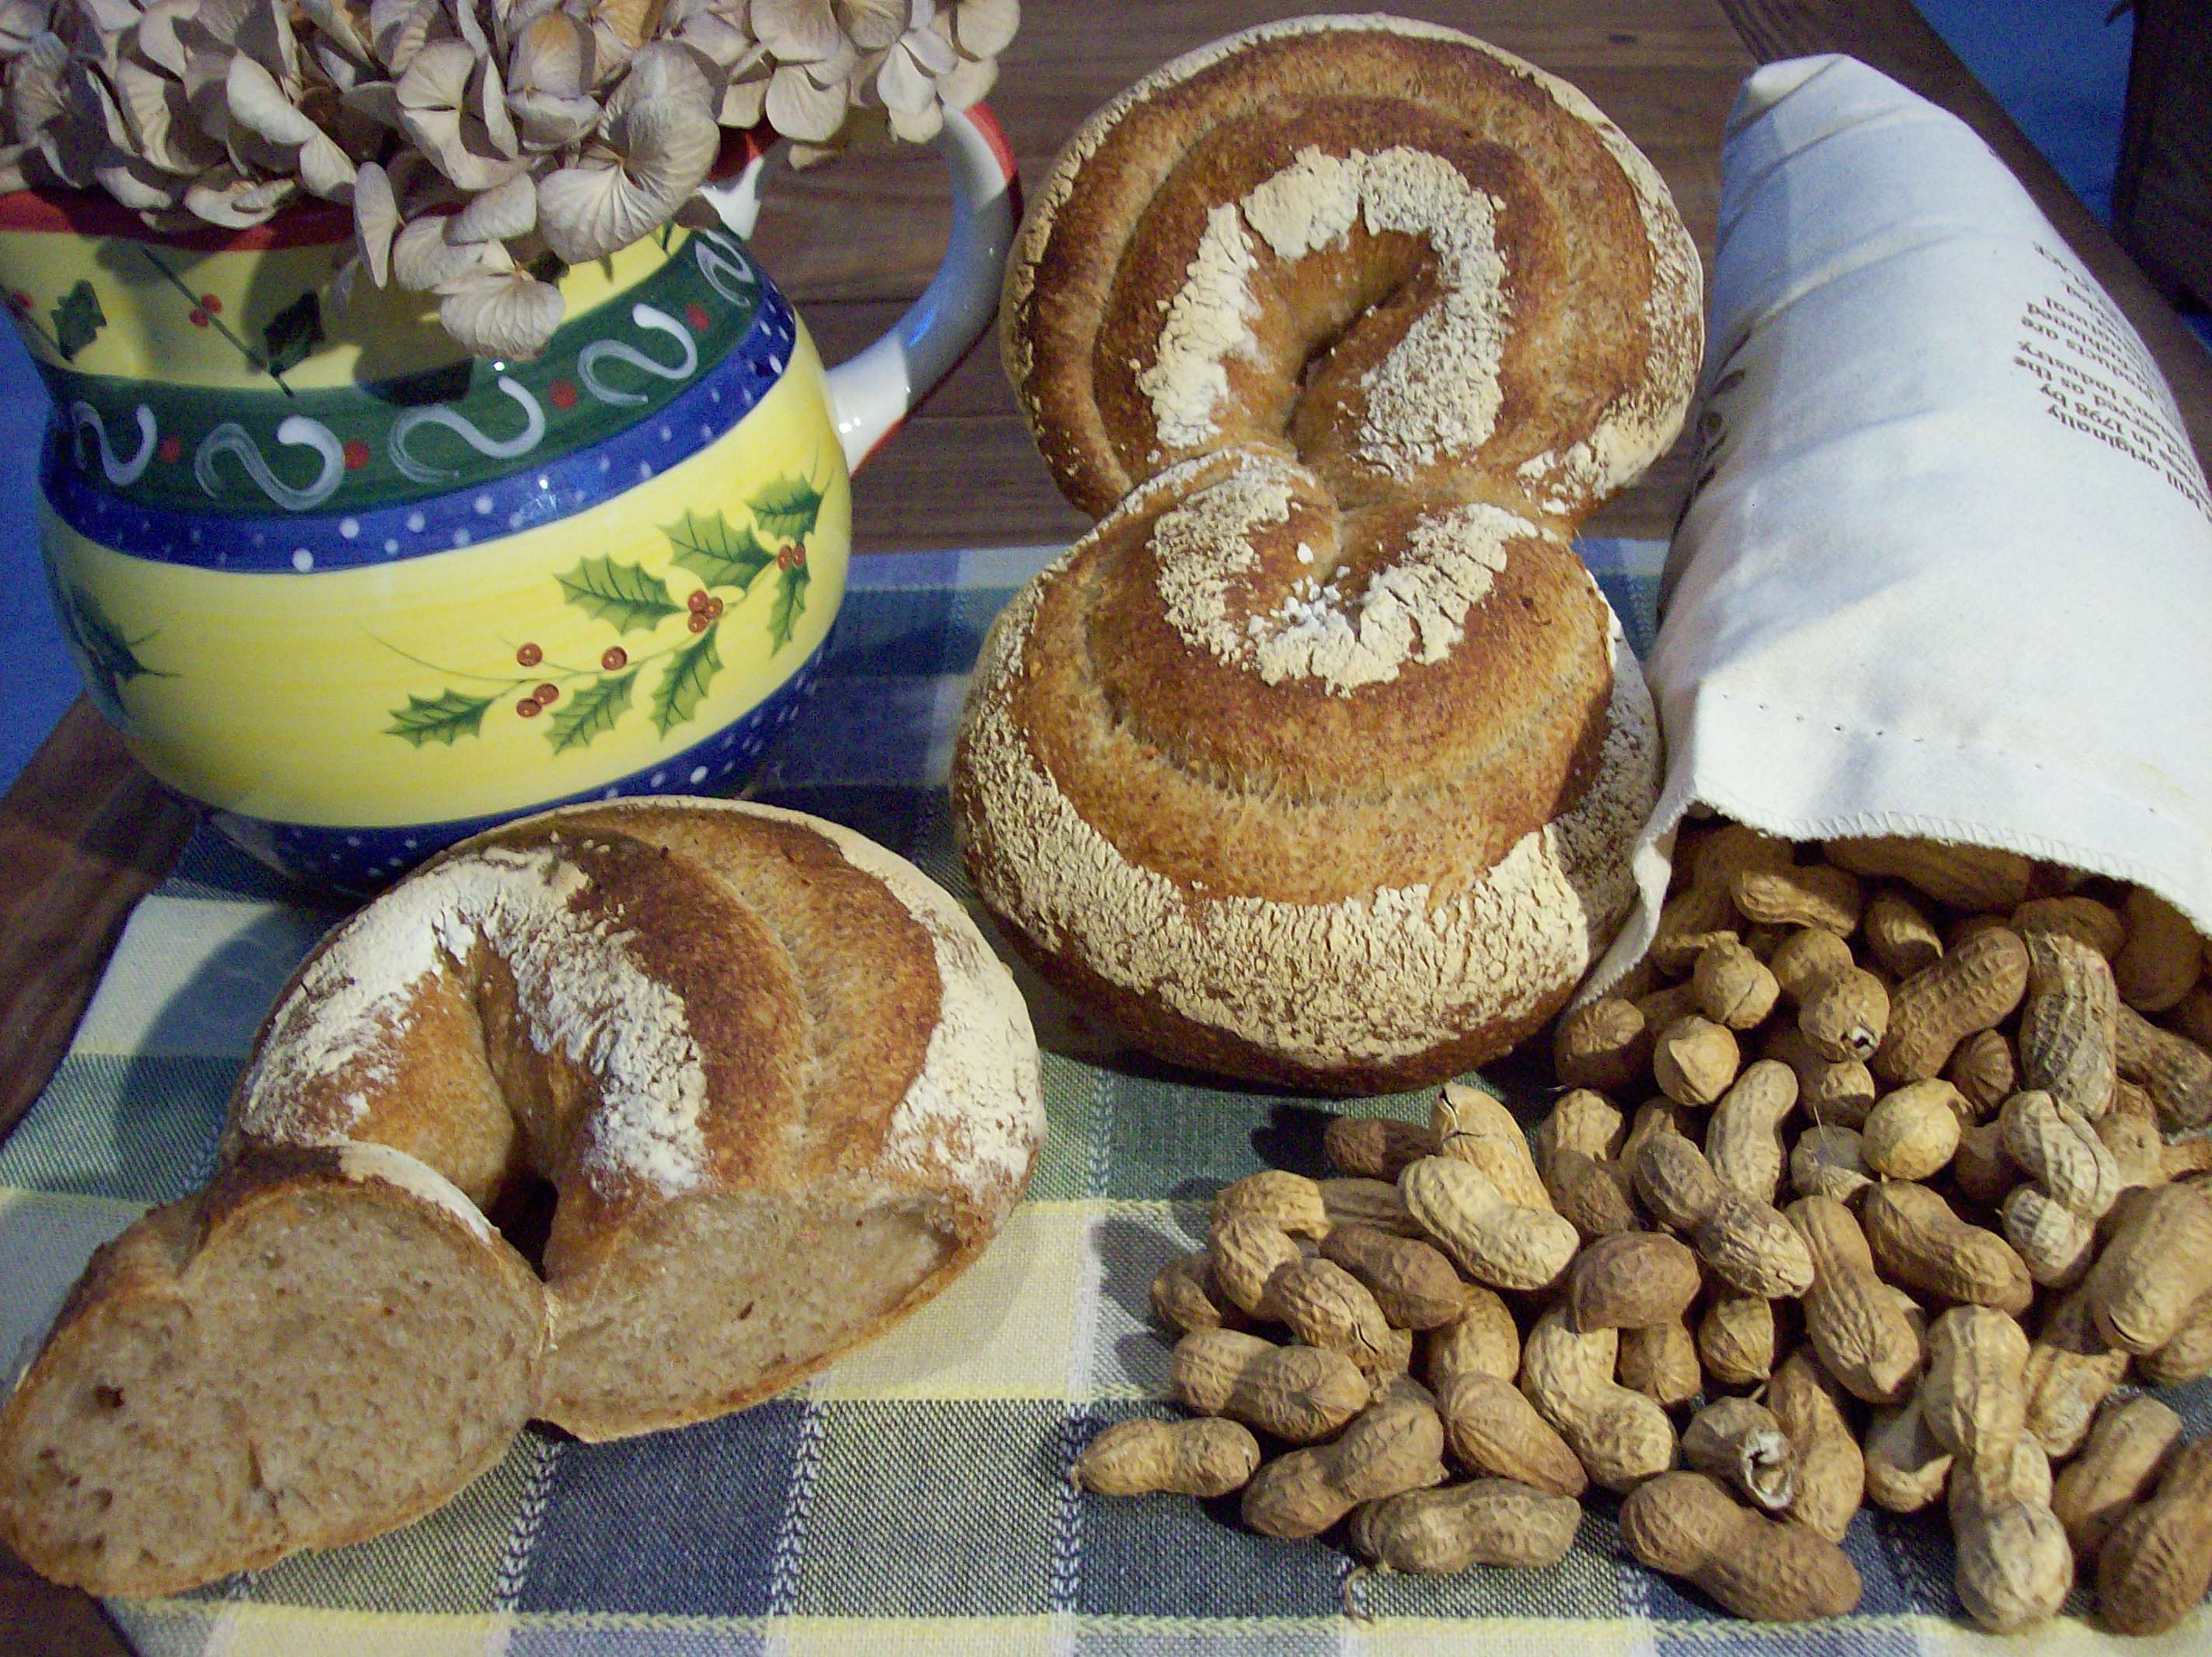
Jimmy’s Bread, whose formula is detailed in this post, derives its nuanced peanut flavor from freshly roasted peanuts which have been ground into a fine meal. A whole wheat sponge gives the bread its depth of flavor. To add esthetic appeal, the loaves are shaped in the form of a peanut shell. Dab a bit of fruit compote on a slice of this bread for a sophisticated version of the classic peanut butter and jelly sandwich.
Sponge
- 20 g King Arthur All-Purpose Flour
- 165 g King Arthur Whole Wheat Flour
- 120 g Water
- 1/8 tsp. Instant Yeast
Final Dough
- 365 g King Arthur All-Purpose Flour
- 345 g Water
- 10 g Salt
- ˝ Tsp. Instant Dried Yeast
- 305 g (all of the above) Biga
- 30 g Peanuts, freshly roasted and finely ground
The night before baking, the sponge is prepared by mixing the whole wheat and all-purpose flours, water and yeast until a homogenous mixture is obtained. The water temperature should be adjusted so that the final temperature of the sponge is 72-74şF. The bowl containing the sponge is then covered and allowed to ferment at 72-74şF for approximately 12 hours.
The next morning, the peanuts are roasted in a toaster oven at 350şF until fragrant, about 5-10 minutes. The peanuts are allowed to cool to room temperature, then ground into a fine meal. This can be done either by hand or in a food processor. If using a food processor, be sure to use short pulses to ensure that the peanuts are not overprocessed into peanut butter.
All the ingredients in the final dough, with the exception of the water and peanuts, are then placed in the bowl of a home stand mixer. Approximately 80-90% of the water is then added and the mixer is run at speed 2 until all the ingredients are incorporated, about 3 minutes. The mixer is then set on speed 3 and mixing is continued until the very loose dough pulls away from the sides and bottom of the bowl, about 10 minutes. At this point, the remainder of the water is slowly added and mixing is continued at speed 3 until all the water is incorporated, about 5 additional minutes. The mixer speed is then reduced to speed 2 and the peanut meal is added. Mixing is continued until all the peanut meal is evenly incorporated, about 3 minutes.
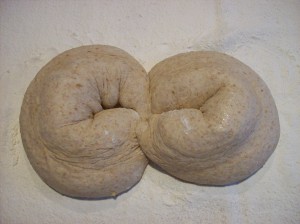
The dough is then placed in a lightly oiled container, covered and fermented for 2 hours, folding the dough twice at 30 minute intervals into the fermentation. At the end of the 2 hour fermentation, the dough is divided into 4 pieces of 225g each, and each piece is lightly rounded. After resting under a plastic sheet for 20 minutes, each piece is tightly formed into a batard. After allowing the batards to rest under a plastic sheet for an additional 20 minutes, they are then shaped into fendus (shaping a fendu can be found here). One of the fendus is placed, seam side down, on a floured couche with the ends touching each other, forming a teardrop shape. This is repeated with a second piece of dough, this time placing one end above and one end below the ends of the piece already on the couche. The 2 dough pieces will thus form a single peanut shell-shaped loaf, as shown below:

This is repeated for the remaining 2 pieces of dough. After allowing the loaves to proof, seam side down, for about 45 minutes at 74şF, they are then flipped onto a transfer peel and then slid from the transfer peel to the oven peel so that they are now seam side up. The loaves are then loaded into the oven and baked at 475şF for 25 minutes, the first 10 minutes under steam. Allow the loaves to cool before slicing.

Wow, beautiful loaves. I love the shape. I can’t wait to try that one. Next weekend for sure. Meanwhile I made the cherry-pecan bread and it turned out scrumptious. I’ll post pics on Bombance as soon as I have time to translate the recipe. Thank you so much!
Steve, you are an artist! Your presentations are always so beautiful.
Would it be too “gourmand” to add a little peanut butter even if the taste is in the bread? 🙂
Lovely shaping, and I’m it gave off the most wonderful scent baking, like the shops where they roast and grind the peanuts right there. We had one in a mall and every time I went by, I had to take a look.
Oh! Better yet… chocolate hazelnut spread on top!
Jane
MC, the shaping was a big part of the fun in making this bread. I think you’ll enjoy baking and eating this one. I look forward to seeing your post on the cherry pecan bread on Bombance.
Patsy, thanks for your kind words. But I have to give credit on this one to the members of the 2005 Team USA!
Jane, you are quite right… the aroma given off while baking this bread is sublime! I already beat you to it with the chocolate hazelnut spread (at least with the cherry pecan bread, on which it was delicious!). Now I must try it on this bread as well.
Your breads are always beautiful! I have to try this one.
hello,steve,je n’ai pas encore fait le pain au mais,mais j’ai fait votre magnifique pain Á la cerise&aux noix de pecansun vrai delicevraiment un gout tres tres bon.a .j’aimerai bien vous envoyer les photos,mais je n’ai pas votre adresse emailmerci de me la donner.
Christiane, je suis heureux que vous ayez bÁ©nÁ©ficiÁ© de la cerise et noix de pÁ©can pain. Je voudrais bien voir vos photos. Je vais vous envoyer un e-mail avec mon adresse.
I love your version of PB&J!
For a PB&J, this would drive my husband wild. Wonderful loaf!
hello steve ,votre pains aux cacahouetes est merveilleux,j’avais prÁ©vu de le faire ce wk mais ma fille &son petit ami ont mangÁ© les peanuts!mais je vais m’y mettre rapidement
Christiane, merci pour les compliments. Vous devez cacher votre cacahouetes! 🙂
This looks incredibly tasty. I grew up with a sister who had a terrible peanut allergy and thus didn’t partake much in them. Now, on my own I am free to eat as many PB&J sandwiches (or bake as many peanut bread loaves!) as I want. Thanks for the wonderful recipe. I wonder if you could do a variation on this with other nuts.
Claire, I don’t see why you couldn’t vary this recipe in any way you want. Go nuts! 🙂
lovely bread, Steve. the shape is perfect. Thanks for your recipe
regards
Hi Carmen, thanks for your kind words. The members of the 2005 Team USA really outdid themselves when they developed the recipe for this terrific bread!
OMG – This recipe is divine.
I found the sponge to be very stiff, and the resulting combined mixture to be very soft, but i persevered, and the end result is to die for. I used crunchy peanut butter, but next time will try “real” peanuts.
I also made them into batards rather than the “funny” shape as above
Thank you so much
Hi Chris, I’m glad you enjoyed the recipe.
Hi Steve…..Dumb question of the day….
How big (dimensions) is the platic box you use to prove you dough in the videos.
I want to adopt the same technique and dont want to overdo/underdo it.
Cheers
Chris
Chris, the dimensions are 13″L x 8″W x 4″D.
I have changed the quantities slightly because the resulting dough was very slack (maybe the difference in flours on this side of the World).
My changes are…
20 Grams Flour
160 Grams Whole Wheat Flour
130 Grams Water
1/2 Teaspoon Yeast
The Following Morning
360 Grams White Flour
290 Mls Water (260ml Plus 30ml)
10 Grams Salt
1 Teaspoon Yeast
30 Grams Peanuts
Also, I concur with the comment to use peanuts, and not peanut butter, which I used the first time because I had no peanuts.
Thank you so much for these forums, I have learned so much.
Chris
Chris, as you have discovered, different flours can have very different water absorption characteristics. That is the reason why I always make it a point to explicitly state the brand and type of flour I am using for each recipe. You were quite right to adjust the quantity of water to your particular flour.
I’m keen to try out your peanut bread, but am thinking I’d like to do it with my sourdough starter. Have you tried this already, is there anything I should watch out for before just jumping in and doing it? I notice from the other comments, that one guy thought the hydration to be quite high, which you remarked was why you explicitly mention the flour used – is extra water also handy because the ground peanut absorbs more than its fair share too?
Marcus, I’ve never prepared this bread using a sourdough starter but I see no reason why it couldn’t be done. Just be sure to allow for longer fermentation times. And I’m always prepared to adjust the amount of water added to give a dough with the proper consistency.
Well I gave the sourdough peanut bread a shot, reduced the water content a little and increased the peanut a tiny bit, and I really like the flavour, specially now the bread’s almost a day old. I would attach a picture, but I didn’t put enough tension into the loaf and it ‘pancaked’ a bit on going into the oven – all part of the rich pageant etc etc.
Even with the reduced water content, I think it was still just over the 70% hydration mark, and the crumb is pretty well aerated with some good-sized holes!
[…] I’ve tweaked things a bit, mostly in the shaping and instruction end of things, as the original instructions directed you to make a really beautiful but really, really hard to explain shape. (It’s two […]